![]()
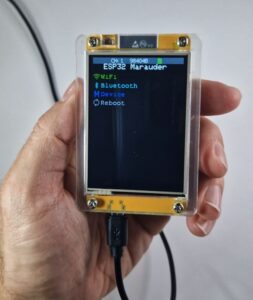
The Cheap Yellow Display (CYD) is a cost-effective development board that has captured the attention of the maker community. Featuring a 2.8-inch TFT touchscreen LCD and powered by an ESP32 microcontroller, this device is ideal for a variety of IoT and graphical user interface (GUI) projects. In this blog, I will focus on the most popular offensive security projects such as Marauder, Bruce and Ghost ESP to get most of this device and compare them in the end.
Key features
The CYD is equipped with an ESP32-WROOM-32 module, a dual-core microcontroller unit (MCU) that integrates Wi-Fi and Bluetooth capabilities. This makes it a versatile tool for wireless communication projects. The 2.8-inch TFT touchscreen, with a resolution of 240×320 and resistive touch functionality, provides an interactive interface for users. Additionally, the device includes a microSD card slot for extra storage, an RGB LED for visual indicators, and multiple GPIO pins for connecting various peripherals.
For who?
This device is particularly suitable for beginners, as it requires no soldering, making it easy to start using right out of the box. Experienced makers will appreciate its potential for quick prototyping without the need for extensive hardware assembly. Project enthusiasts will find it perfect for building innovative projects without needing deep hardware knowledge.
Available projects
The CYD community has developed a wide range of projects, from simple displays to complex IoT applications. Some notable projects include weather stations, home automation systems, portable game consoles, and interactive art installations. These projects showcase the device’s versatility and the creativity of its users.
Where to buy
You can purchase the CYD from various online retailers. AliExpress is typically the most affordable option, with prices around €15.
Hacking Projects
Let’s explore three exciting projects that demonstrate the versatility of the CYD: Marauder, Bruce, and Ghost_ESP and Evil-M5Project. Unfortunately, Evil-M5Project right now supports only CYD2USB, and I wasn’t able to test it on my CYD with microUSB CYD-2432S028.
Marauder is a Wi-Fi penetration testing tool that utilizes the CYD’s capabilities to scan and analyze Wi-Fi networks. This project includes features such as network scanning, deauthentication attacks, and packet sniffing. It is ideal for cybersecurity enthusiasts and professionals looking to test network security. By leveraging the CYD’s powerful ESP32 module, Marauder can perform a variety of network tests and provide valuable insights into network vulnerabilities.
Bruce is a Bluetooth Low Energy (BLE) scanner and analyzer. This project allows users to scan for BLE devices, analyze their data, and interact with them. It is particularly useful for developers working on BLE applications and IoT projects. Bruce takes advantage of the CYD’s Bluetooth capabilities to provide a comprehensive tool for BLE development and testing. Users can explore the BLE environment around them, gather data from various devices, and even develop new BLE applications.
GhostESP is a stealthy network monitoring tool. This project monitors network traffic, detects anomalies, and provides real-time alerts. It is perfect for network administrators and security professionals who need to keep an eye on network health. GhostESP uses the CYD’s Wi-Fi capabilities to monitor network activity discreetly. It can detect unusual patterns, alert administrators to potential issues, and help maintain the overall security and performance of the network.
These projects highlight the CYD’s potential in various fields, from cybersecurity to IoT development. Whether you’re a beginner or an experienced maker, the Cheap Yellow Display offers a versatile and affordable platform to bring your ideas to life.
View on Threads
In further sections I will test each of them so you don’t have to.
Marauder
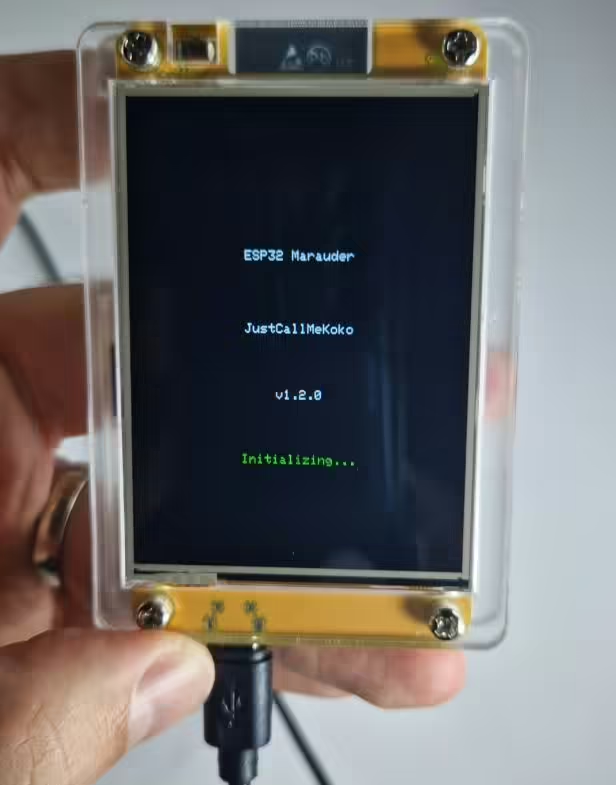
The ESP32 Marauder firmware is a versatile tool designed for WiFi and Bluetooth testing created by justcallmekoko. It can be installed on various hardware platforms, including the affordable Cheap Yellow Display (CYD). This guide will walk you through the installation process, running the firmware, and utilizing its features effectively.
Installation
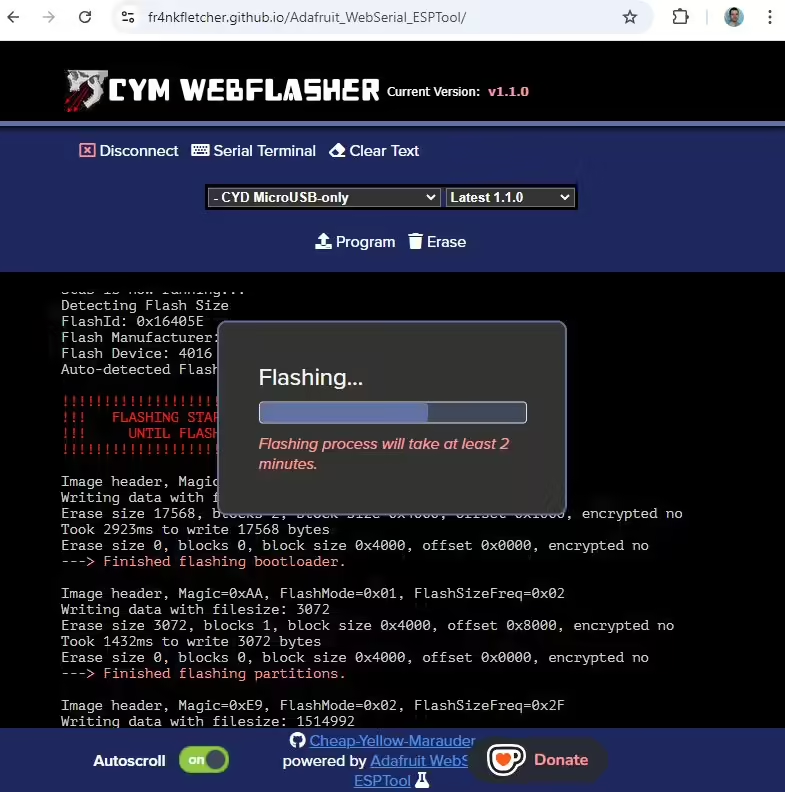
The most convenient way is using Web Flasher Method, by following instructions below.
- Open the CYM Web Flasher in your Chrome browser.
- Click “Connect” and select your CYD module from the list.
- Choose the appropriate model and firmware version.
- Click “Program” to start flashing the firmware.
Troubleshooting
- If issues arise, try unplugging and restarting your CYD module.
- Hold the RST button, tap BOOT, release RST, and refresh the Web Flasher page.
- If problems persist, hold BOOT while clicking “Connect”.
Running the Firmware
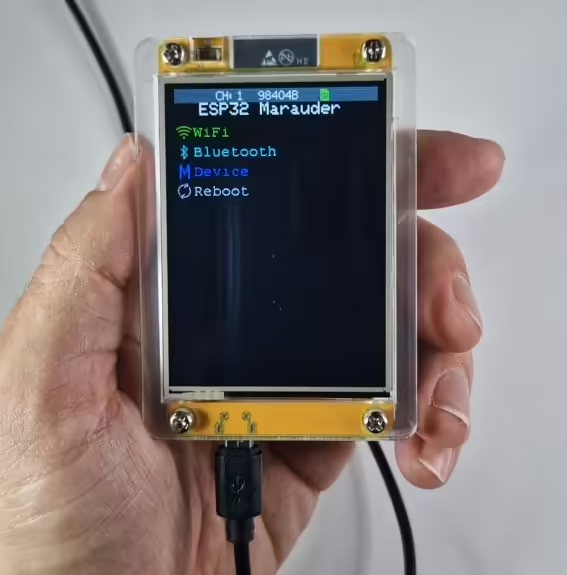
After successfully flashing the firmware, your CYD module will boot into the Marauder interface. This interface offers a range of features for WiFi and Bluetooth testing. You can scan for networks, capture packets, and test security measures. Additionally, you can enable logging to an SD card for detailed analysis of your testing activities. If you have a GPS module, connect it to the CYD for location-based testing, which can be particularly useful for wardriving.
Usage and Functionalities
The ESP32 Marauder firmware comes packed with a variety of features designed to enhance your WiFi and Bluetooth testing capabilities:
- WiFi
- Sniffers
- Probe Request Sniff
- Captures probe request sent from surrounding WiFi clients against any network.
- Beacon Sniff
- Captures AP beacons sent from surrounding WiFi Access Points.
- Deauth Sniff
- Captures deauths and disassociations sent from surrounding WiFi clients and APs against any network or client.
- Packet Monitor
- Captures WiFi traffic to display and harvest general 802.11 management frames on a graphical user interface.
- EAPOL/PMKID Scan
- Harvest EAPOL PMKID packets on a graphical user interface.
- Detect Pwnagotchi
- Captures WiFi traffic to display the information of any active pwnagotchis within range of this device.
- Scan APs
- Raw Capture
- Station Sniff
- Signal Monitor
- Probe Request Sniff
- Wardriving
- Attacks
- Beacon Spam List
- Beacon Spam Random
- Rick Roll Beacon
- Probe Req Flood
- Evil Portal
- Deauth Flood
- AP Clone Spam
- Deauth Targeted
- General
- Join WiFi
- Shutdown WiFi
- Add SSID
- Generate SSIDs
- Clear SSIDs
- Sniffers
- Bluetooth
- Sniffers
- Bluetooth Sniffer
- Flipper Sniff
- Airtag Sniff
- Detect Card Skimmers
- Bluetooth Attacks
- Sour Apple
- Swiftpair Spam
- Samsung BLE Spam
- Google BLE Spam
- Flipper BLE Spam
- BLE Spam ALL
- Spoof Airtag
- Sniffers
- GPS
- Device
- Update Firmware
- Device Info
- Reboot
Usage Tips
The ESP32 Marauder firmware provides several advanced features that can enhance your testing capabilities. For example, you can use the wardriving menu to map out WiFi networks in your area. The Evil Portal feature allows you to set up and test captive portals, giving you insights into how they can be used in security testing. Additionally, integrating the Flipper Zero with your CYD module can provide even more testing options.
Bruce
Bruce is a ESP32 firmware designed for offensive security operations, supporting various devices including the CYD-2432S028 display. Here’s a comprehensive guide on how to install, run, and utilize Bruce on this display.
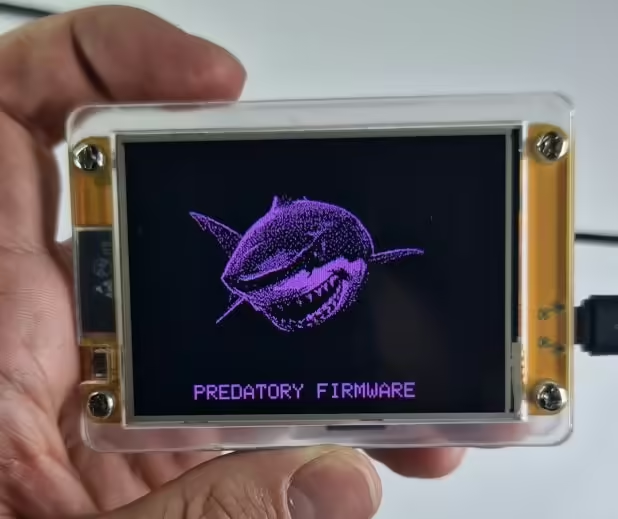
Installation
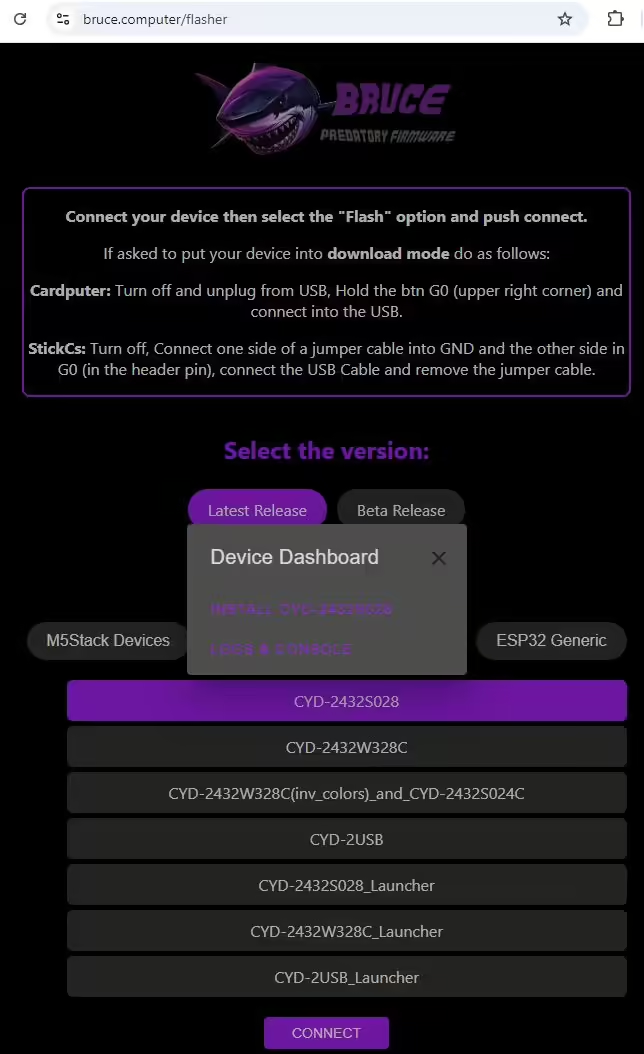
The easiest way to install Bruce is by using the official Web Flasher. This tool allows you to flash the firmware directly from your browser, simplifying the process significantly. Follow these steps:
- Open your web browser and go to the Bruce Web Flasher.
- Connect your CYD-2432S028 display to your computer via USB.
- Follow the on-screen instructions to select the appropriate firmware file and flash it to your device.
Running Bruce
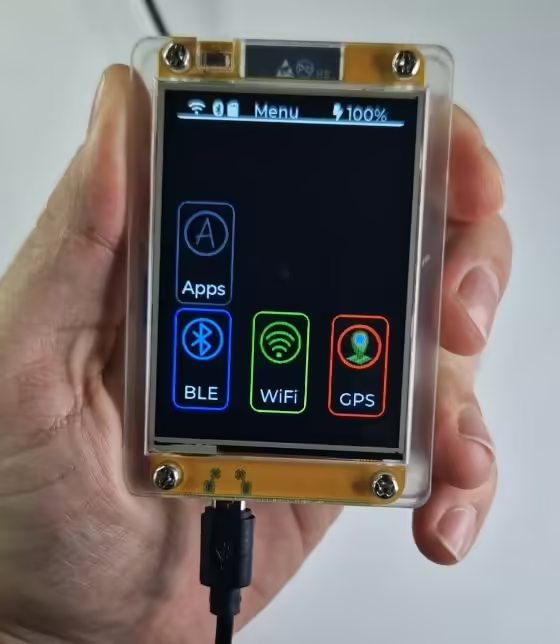
Once installed, Bruce will automatically start running on your CYD-2432S028 display. You can interact with it through various interfaces depending on your setup:
- WiFi: Connect to the device’s WiFi network to access its web interface.
- Serial Monitor: Use a serial monitor to view logs and interact with the firmware directly.
Usage and Functionalities
Bruce offers a wide range of functionalities tailored for offensive security and red team operations. Here are some key features:
- WiFi
- Connect WiFi
- WiFi AP
- Creates a BruceNet access point with default brucenet password.
- WiFi Atks
- Target Atk
- Deauth
- Clone Portal
- Deauth+Clone
- Beacon Spam
- Funny SSID
- Ricky Roll
- Random SSID
- Deauth flood
- Target Atk
- Evil Portal
- In EVIL Portal mode, BRUCE reads the keyboard input for the SSID and activates a open WiFi, with DNS, DHCP and Web servers activated.
- ReverseShell
- TelNET
- Connect to TelNet servers and execute remote commands.
- SSH
- Connect to SSH servers and execute remote commands.
- DPWO
- Searches for default credentials for some router operators.
- Raw Sniffer
- Saves .pcap to SD card with raw monitoring, you can also select for it to save only EAPOL/HandShakes and stop spamming deauth packets to detected beacons previously detected.
- Scan Hosts
- Host info
- Discover open ports (20, 21, 22, 23, 25, 80, 137, 139, 443, 3389, 8080, 8443, 9090) on the host.
- SSH Connect
- Tries to connect into the Host using SSH.
- Station Deauth
- Spams deauth frames targeted to this particular device.
- ARP Spoofing
- Sends fake ARP Resonses to the host and to the Gateway, provoking communication interruption.
- ARP Poisoning
- Sends fake ARP responses to all hosts and to the gateway with random MAC addresses. It can possibly cause CHAOS in the network, as all devices won’t find the gateway to communicate.
- Host info
- Wireguard
- To be able to connect to a wireguard tunnel with your cardputer easily, you need to have your .conf file and place on the SD card root directory called “wg.conf” If you don’t know how to generate a .conf file for wireguard.
- Brucegotchi
- Pwnagotchi equivalent to collect and save handshakes (EAPOL)
- BLE
- Media Cmds
- Control your smartphone’s media functions such as take screenshots, play, pause, stop etc.
- BLE Scan
- Scan for nearby Bluetooth Low Energy (BLE) devices effortlessly.
- Bad BLE
- Simulate a keyboard to deploy DuckyScripts to paired devices.
- iOS Spam
- Windows Spam
- Samsung Spam
- Android Spam
- Spam All
- Media Cmds
- RF
- Scan/Copy
- Replay
- Custom SubGhz (limited compatibility)
- Spectrum Analysis
- Jammer Full (New)
- Jammer Intermittent
- RFID
- Read
- Write
- Clone
- Write NDEF Records (NFC tags only)
- Erase
- Save file
- Load file
- IR
- TV-B-Gone: Sends infrared signals to turn off various screens.
- Custom IR: Allows sending of custom IR codes from files stored in LittleFS or on an SD card.
- IR Read: Capable of reading and decoding incoming IR signals.
- FM
- Play on 76-108 MHz frequencies with a Si4713 module.
- Files
- File manager
- GPS
- Wardriving
- GPS Tracker
- NRF24
- Spectrum
- Jammer 2.4G
- JS Interpreter
- Others
- SD Card
- LittleFS
- WebUI
- Make you device as an AP or connect to a network to use the WebUI, with this you can manage your files on the SD card and also LittleFS Before setting up, you need to access http://bruce.local with the credentials on screen to have access to the manager.
- QRCodes
- Megalodon
- BadUSB
- To test BadUSB, you first need to pin CH9329 module
- Openhaystack
- This is a little more complex to setup but basically you can use this repository to generate a AirTag public key encoded in base64. Then to work for Bruce, you should get your Public key decoded with base64 and save it on a file on the SD root called “pub.key”.
- Interpreter
- Timer
- Clock
- Connect
- Send File
- Receive File
- Config
Ghost ESP
Ghost ESP is another ESP32 firmware designed for wireless network exploration and security testing. This guide will walk you through the installation, running, and usage of Ghost ESP, along with a detailed list of its functionalities.
Installation
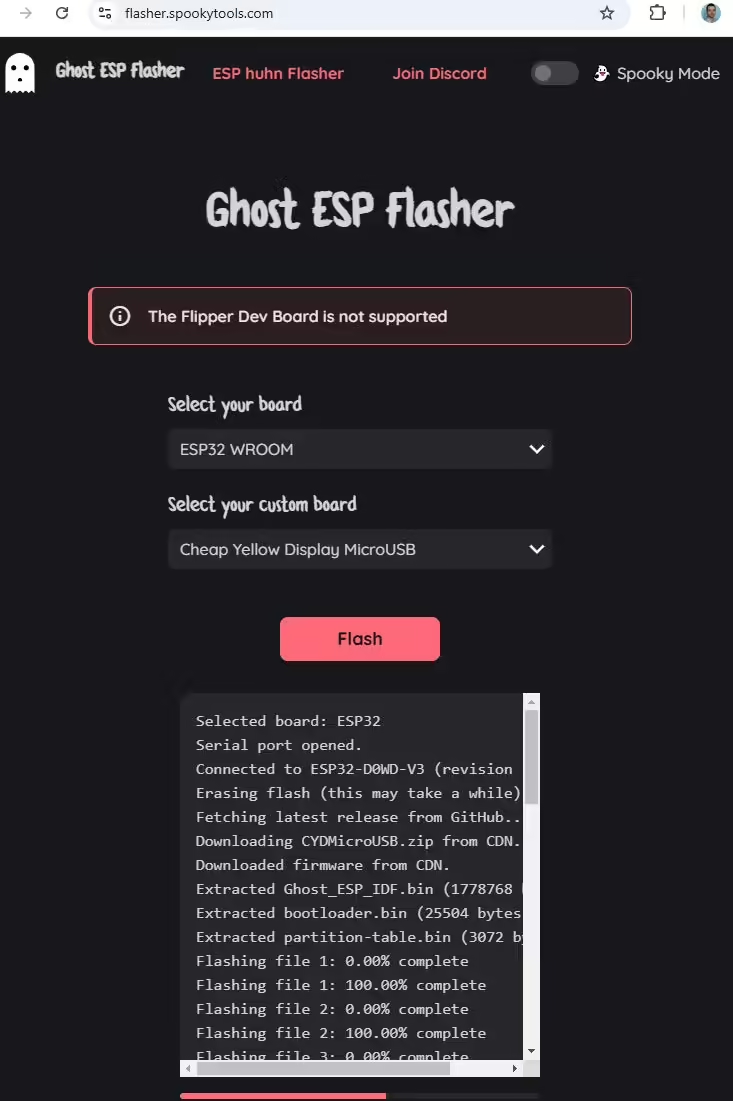
The easiest way to install Ghost ESP on your ESP32 device is by using the Web Flasher. This method allows you to flash the firmware directly from your web browser, making the process straightforward and user-friendly. Follow these steps to get started:
- Open the Web Flasher:
- Launch your web browser and navigate to the Ghost ESP Web Flasher.
- Connect Your Device:
- Connect your ESP32 device to your computer using a USB cable. Ensure that the device is properly connected and powered on.
- Initiate the Connection:
- On the Web Flasher page, click the “Connect” button. A dialog box will appear, prompting you to select your ESP32 device from the list of available ports. Choose the correct port and click “Connect.”
- Select the Firmware:
- Once connected, you will need to select the appropriate firmware for your device. Choose the correct model and version of the Ghost ESP firmware from the dropdown menu.
- Flash the Firmware:
- After selecting the firmware, click the “Program” button to begin the flashing process. The Web Flasher will upload the firmware to your ESP32 device. This process may take a few minutes, so be patient and do not disconnect the device during this time.
- Completion:
- Once the flashing process is complete, the Web Flasher will notify you. You can now disconnect your ESP32 device from the computer. The Ghost ESP firmware should be successfully installed and ready to use.
By following these steps, you can easily install Ghost ESP on your ESP32 device using the Web Flasher, ensuring a smooth and hassle-free setup process. For more detailed instructions, you can refer to the Ghost ESP Installation Guide.
Running Ghost ESP
Once the firmware is installed, Ghost ESP will automatically start running on your ESP32 device. You can interact with Ghost ESP through its user-friendly interface, which provides access to all its features. The display will show the main menu, from which you can navigate to different functionalities.
Usage and Functionalities
Ghost ESP offers a comprehensive set of features for WiFi and Bluetooth testing. Here’s a detailed list of its functionalities:
- WiFi
- AP Scanning
- Detect all nearby WiFi networks
- Detailed visibility into wireless environments
- Station Scanning
- Identify connected WiFi clients
- Monitor active devices on networks
- AP Scanning
- Network Interaction
- Beacon Spam
- Deploy customizable SSID beacons
- Multiple operation modes available
- Deauthentication Attacks
- Disconnect clients from WiFi networks
- For testing network security
- Evil Portal
- Custom SSID and domain setup
- Targeted network testing capabilities
- WiFi Capture
- Capture probe requests
- Record beacon frames
- Log deauthentication packets
- Raw wireless data collection Note: Requires SD card or external storage
- BLE
- General BLE Scanning
- Detect BLE devices
- Monitor BLE advertisements
- Specialized Detection
- AirTag detection mode
- Flipper Zero detection mode Note: Some features planned for future versions
- General BLE Scanning
- Additional Features
- Media Device Integration
- DIAL protocol support
- Chromecast V2 compatibility
- Roku device interaction
- Media Device Integration
Final words
When comparing the features of Marauder, Bruce, and Ghost ESP, each firmware offers very similar capabilities, because of that only small and most likely individual preferences will decide which to use. At the time of testing, my favorites are Bruce and Marauder.
Marauder is quite some time on the market and has a huge community. All the features worked very well. I don’t think there is anything I could criticize it for.
Bruce is available for download only since June 1, 2024, however it contains the same functionality as Marauder. Interaction with Bruce user interface is using a buttons at the bottom of the screen and in my opinion is less convenient then directly taping on the menu buttons. Even though, for some reason I liked it the best comparing to Marauder and Ghost ESP.
Ghost ESP published on Mar 23, 2024 having all the main features as Marauder and Bruce. Some of them were not working correctly, maybe it is just some but that will be fixed in the next update. Similarly, as Bruce, interaction with user interface it not very convenient and it takes some time to find a proper way how to navigate through it.

