![]()
In this guide, I’ll walk you through the steps to install Kali NetHunter on TicWatch Pro smartwatches.
With NetHunter, which is sometimes also called FitHunter, you’ll have access to a suite of penetration testing tools right on your wrist. Since we are limited by the resources and battery, don’t expect desktop features of Kali Linux. As a result, with NetHunter installed on TicWatch Pro you can run Kali services, Custom Commands, MAC Changer, HID Attacks, DuckHunter, Bad USB, Nmap Scan, WPS Attacks, and Bluetooth Arsenal.
If you would like to know more about NetHunter, feel free to look at my Kali NetHunter 101 blog posts series.
Overview
This blog will lead you through rooting and flashing Kali NetHunter on TicWatch Pro (catfish) smartwatches, specifically 2018 version, model WF12096. I will follow official tutorial available on Kali website using their files. Based on the instructions, it should also work on later models such as Pro 2020, Pro 4G/LTE. However, I haven’t tested it. For newer versions such as TicWatch Pro 3 GPS/LTE/Ultra GPS/Ultra LTE you should follow this tutorial.
Requirements
- ADB and fastboot tools installed on your computer.
- TicWatch Pro 2018 (Model WF12096).
- TicWatch Pro 2018 charging dock.
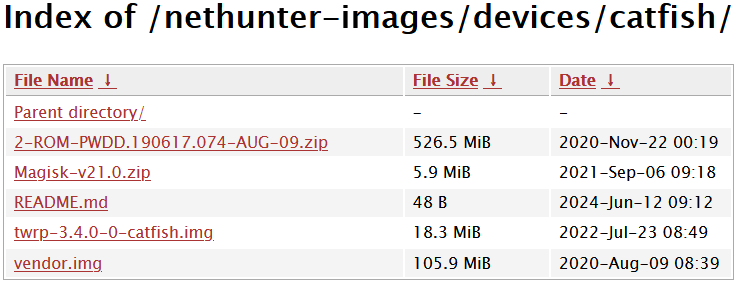
- Download vendor ROM, optimized ROM, TWRP, Magisk.
- Download NetHunter ROM for TicWatch Pro (WearOS Nano).
Installation instructions
Enable ADB debugging
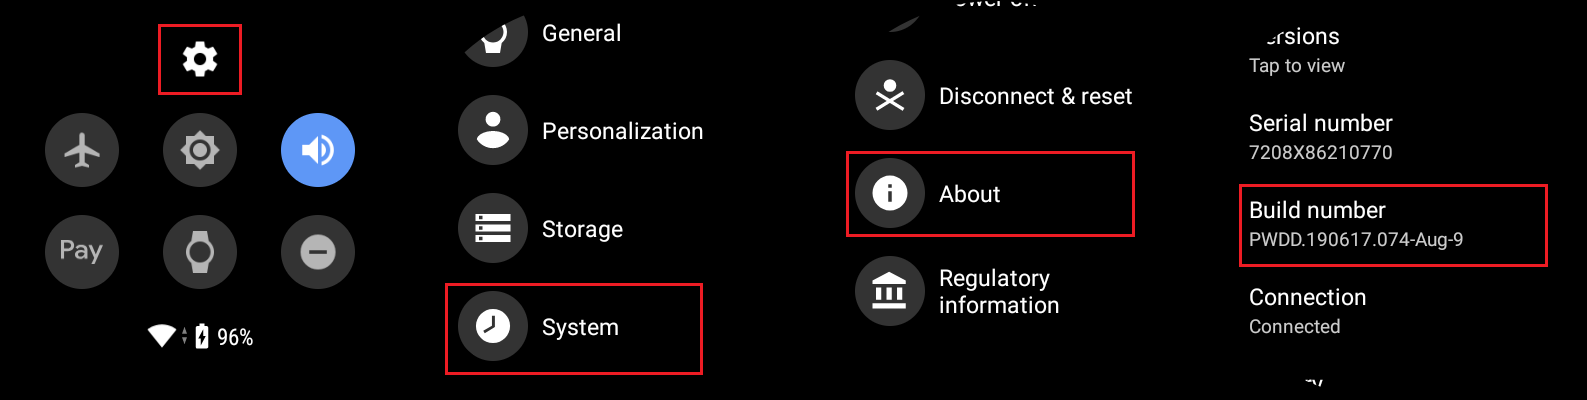
If we want to flash custom ROM, we need to unlock device bootloader. For that we first need to unlock developer mode and enable ADB debugging so we can control TicWatch from computer via charging cable. To enable Developer options go to Settings -> System -> About and tap 7 times on Build number.
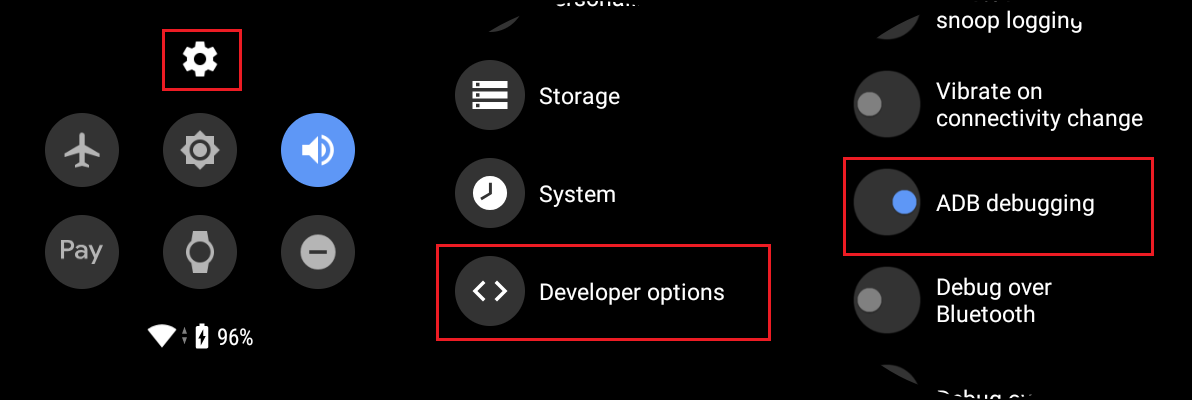
Once Developer options appears in settings, enable ADB debugging so we can boot into bootloader. Open Settings -> Developer options and allow ADB debugging.
After ADB debugging is allowed, you will be prompted with computer authorization. Which basically means if these smartwatches trust connected computer. Select, Always allow from this computer.
Unlock bootloader
Now we need to boot watches in bootloader and unlock it, so we could flash it with custom ROM. You can start TicWatch Pro in bootloader using adb command:
adb reboot bootloader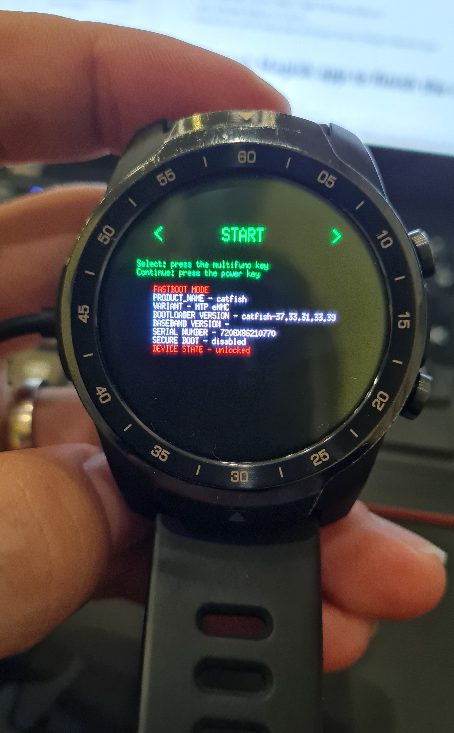
When you see the screen above, it means you are in bootloader and our device can accept fastboot commands. Now, you can unlock bootloader using command:
fastboot flashing unlockIf your computer can’t detect TicWatch being in fastboot mode, it most likely means you need to manually install fastboot drives. This tutorial might help you if you are running Windows 10 or 11.
Flash images, TWRP, Magisk
Download vendor ROM, optimized ROM, TWRP, Magisk.
Use these commands to flash all necessary files from the unzipped file downloaded above:
adb reboot bootloader(reboot into bootloader)fastboot flash vendor vendor.img(using fastboot flash vendor.img)fastboot flash recovery twrp-3.4.0-0-catfish.img(flash custom TWRP recovery over stock), see Figure 5.- Boot into recovery by pressing bottom button two times, confirm by pressing upper button.
- From recovery we will wipe data and cache. Select
Wipe->Advanced Wipe-> pickCache and Data->Wipe - Go back to main TWRP recovery menu. We will side load prerequisite ROM. Select
Install->ADB Sideload->Start. Smartwatches now wait for zip files that will be installed from computer. From computer sideload the ROM usingadb sideload 2-ROM-PWDD.190617.074-AUG-09.zip - Go back to main TWRP recovery menu. We will side load Magisk. Select
Install->ADB Sideload->Start. Smartwatches now wait for zip files that will be installed from computer. From computer side load Magisk usingadb sideload Magisk-v21.0.zip, see Figure 6. - Reboot System and setup watches
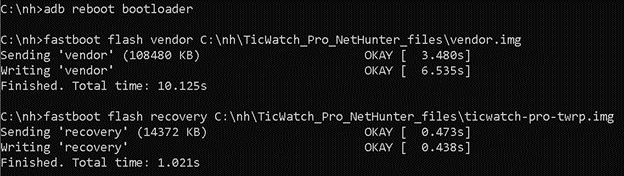
Figure 5 Commands output (ticwatch-pro-twrp.img is renamed twrp-3.4.0-0-catfish.img)

If your watch will not boot Wear OS, but after around 6-10 minutes automatically boot into TWRP recovery, I advise to repeat all the steps.
Setup Magisk
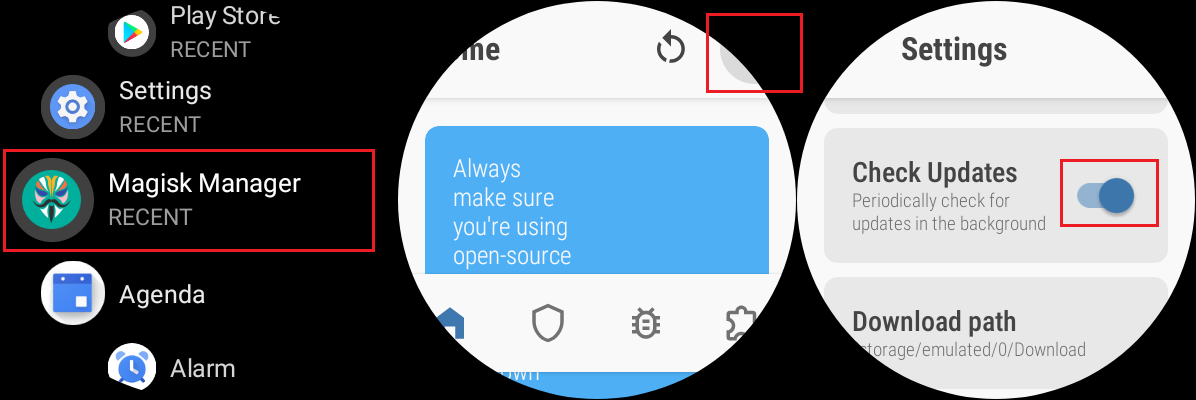
After reboot, setup and pair watches with your smartphone. Enable ADB debugging again, as we did in Enable ADB debugging section. Open Magisk Manager app, go to Settings. Opening Settings might be tricky on watches, since the actual button can’t be seen, you have to tap on that empty space and believe it is there as you see in the screenshot below. From Settings you can disable Check Updates.
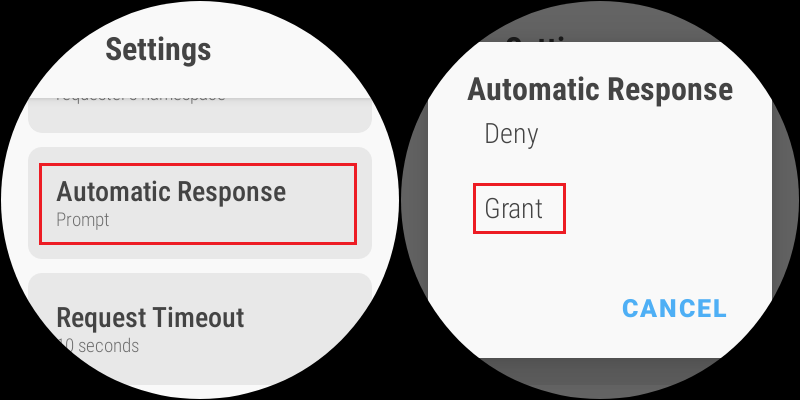
In Settings scroll further down and grant Automatic Response to apps that will request superuser (root) rights, see Figure 7. This step is optional, but saves time and clicks later on.
You can verify if root was successful using commands:
adb shell
su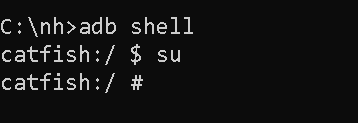
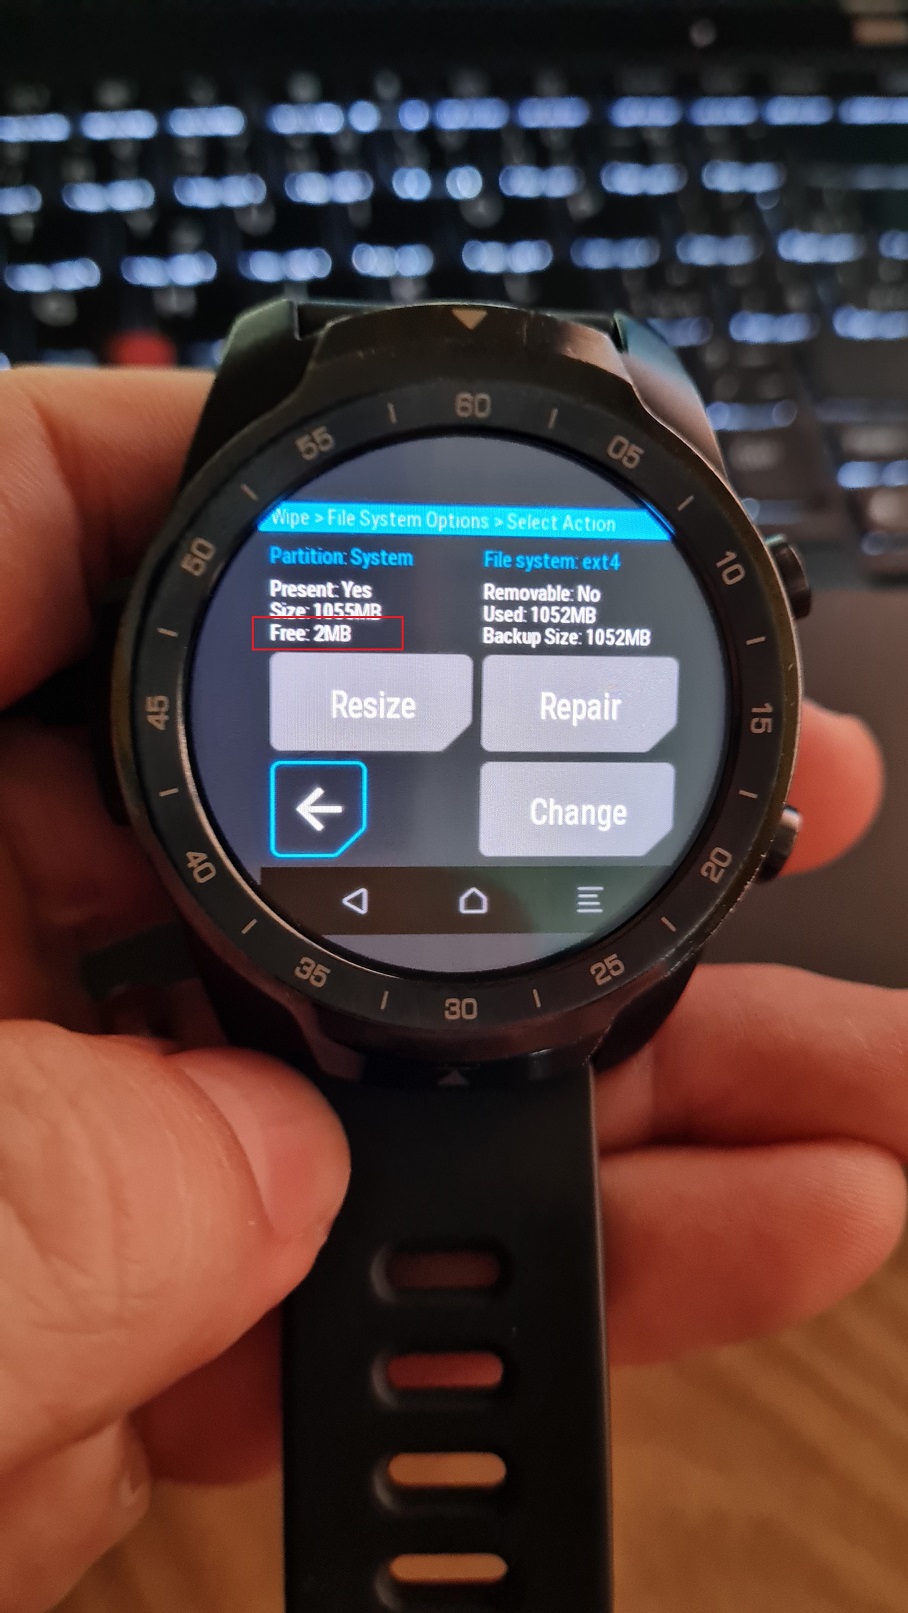
Resize system partition
As per steps in official tutorial, I include this section as well, however I haven’t need to resize the system partition when I first time rooted the TicWatch Pro. In case your system will have 0MB left, you should resize it.
adb reboot recovery- Select
Wipe-> “right arrow suggesting next page” ->File System Options-> tickSystem-> “right arrow suggesting next page” -> if FreePartition Systemis less than around 170 MB, thenResize(it creates around 190 MB of free memory on system partition), see Figure 9 - Reboot to recovery
Install NetHunter
When everything is setup – customize ROM flashed and device successfully rooted, we can install NetHunter image.
- Go to TWRP recovery:
adb reboot recovery - We will sideload NetHunter image. From recovery select
Install->ADB Sideload->Start. Smartwatches now waits until zip files will be installed from computer usingadb sideload nethunter-2022.1-catfish-wearos-kalifs-nano.zip - Reboot system
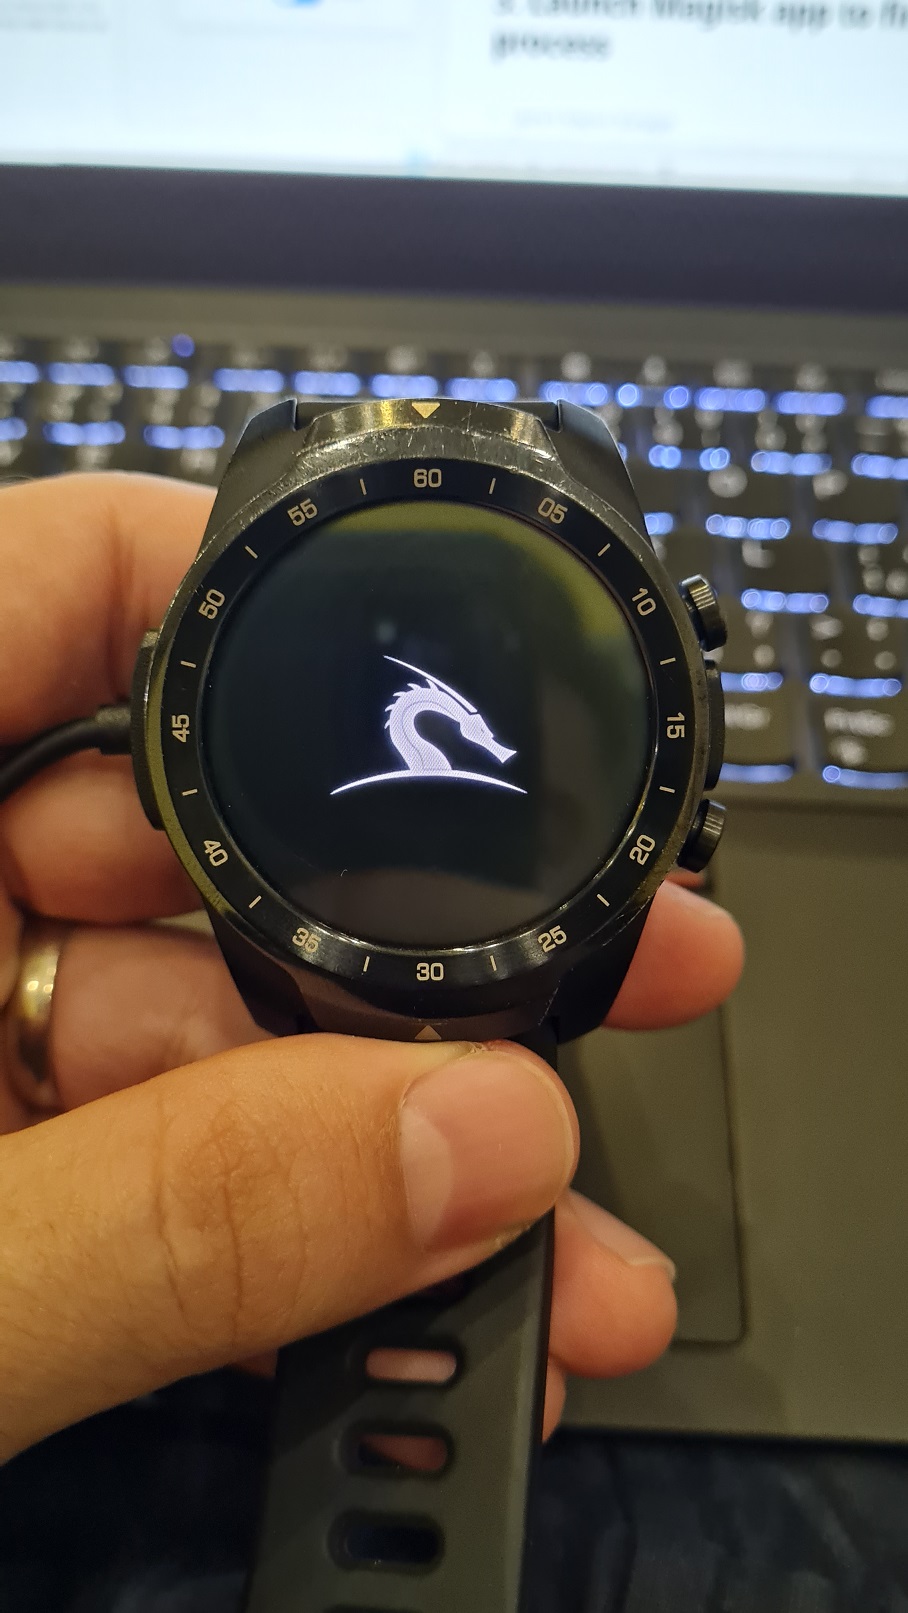
Now your TicWatch Pro should invite you with boot logo Kali, see Figure 10.
Initial Kali NetHunter setup
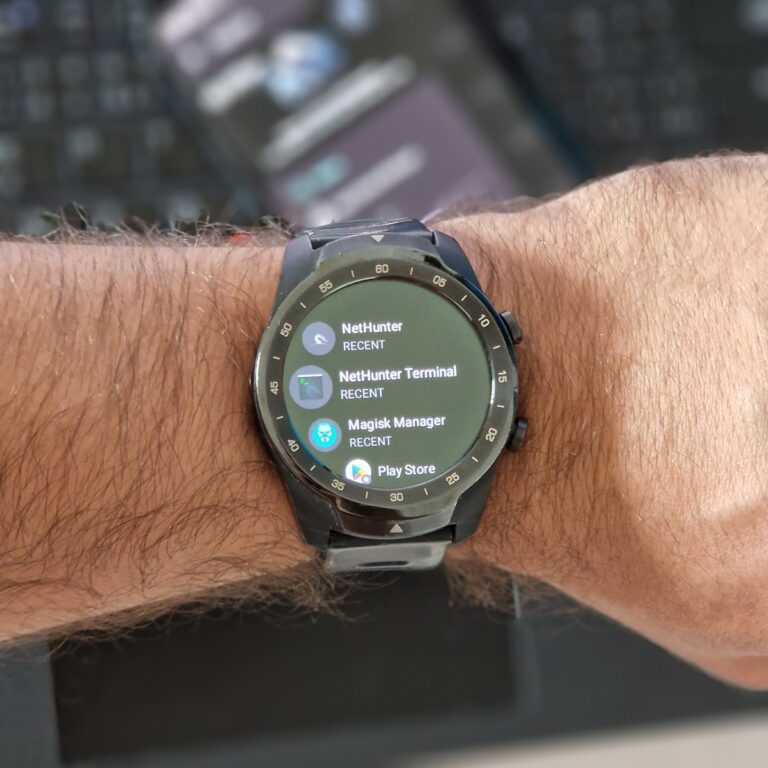
NetHunter is now running on top of customized Wear OS as a chroot. In menu appears two new apps: NetHunter and NetHunter Terminal. First thing we need to start chroot from NetHunter app.
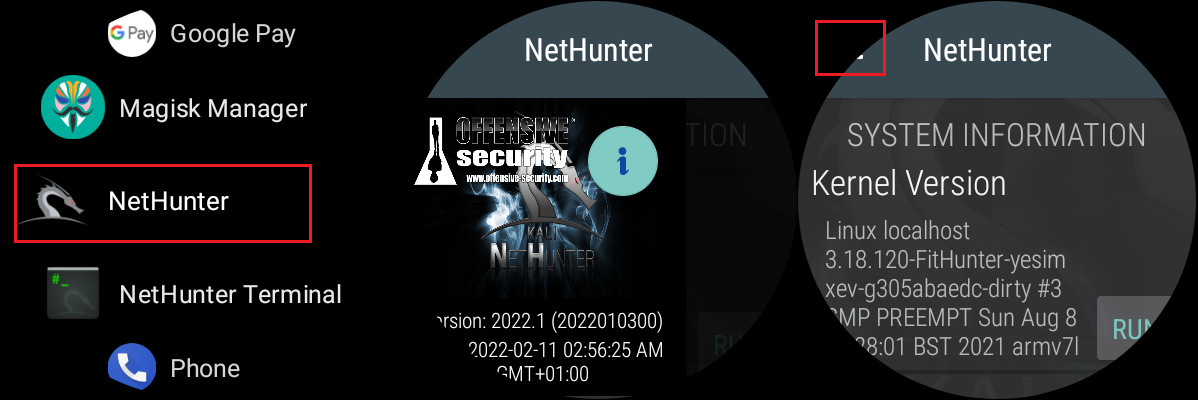
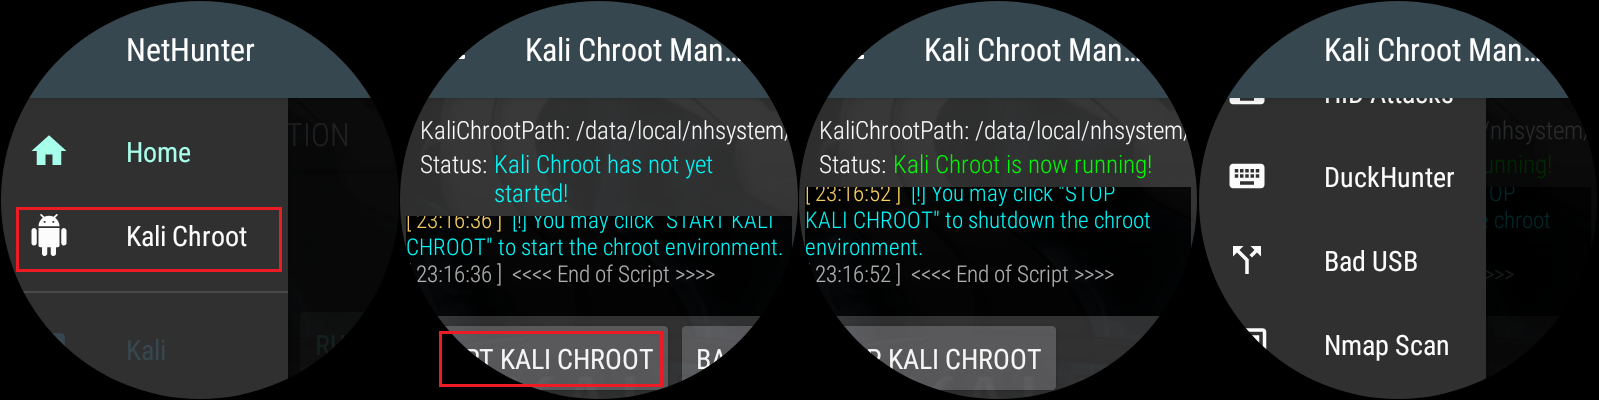
From now on, you can use some of NetHunter tools directly from your wrist.
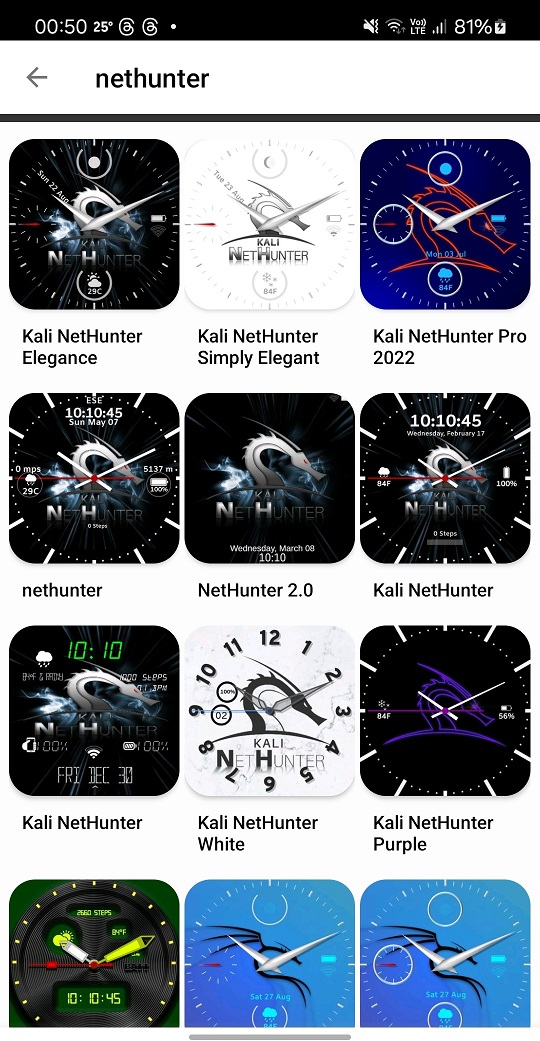
Download NetHunter watch face
Besides @yesimxev great work making NetHunter running on watches, he also created a typical Kali watch faces that are available for download via Facer Watch Faces app on Google Play when searching for NetHunter.

You can also browse for watch faces from smartphone.
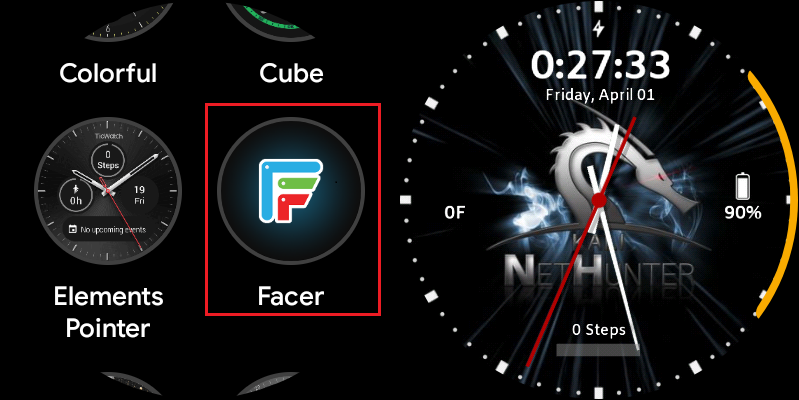
Once downloaded, you can set it from faces option.
Extend battery life
This is an extra tip for a smoother battery life I found on XDA Developers forum. In case you are not going to use system Mobvoi apps, you can manually disable them to extending battery life of TicWatch Pro. When you decide to use them again, you can simply enable them.
Check for list of Mobvoi apps using command:
adb shell pm list packages | grep mobvoi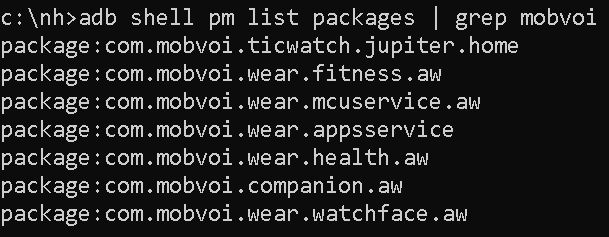
We can verify that six of them are also running using command:
ps -A | grep mobvoi
Now you can disable them all manually using their package name as input, using commands below:
adb shell pm disable-user --user 0 com.mobvoi.wear.health.aw
adb shell pm disable-user --user 0 com.mobvoi.wear.appsservice
adb shell pm disable-user --user 0 com.mobvoi.companion.aw
adb shell pm disable-user --user 0 com.mobvoi.wear.fitness.aw
For enabling them use commands:
adb shell pm enable com.mobvoi.wear.health.aw
adb shell pm enable com.mobvoi.wear.appsservice
adb shell pm enable com.mobvoi.companion.aw
adb shell pm enable com.mobvoi.wear.fitness.aw
Troubleshooting
Hopefully you end up with the same results as I did. If not, and your TicWatch Pro is stuck in bootloop or not booting in Wear OS but always in recovery mode, you can go back and start clean. How to flash stock ROM will be a topic of my next blog.
Hi , I did this but after sideloading nethunter, the google play store does not update or download any application.